
Why edge banding?
Cut edges of sheet goods show the bare core: the plies of plywood, the porous fiber of MDF, or the chips under a melamine face. Edge banding is a thin strip that covers that edge. The most common kind is pre-glued melamine banding you apply with a household iron: cheap, but brittle and not moisture-proof. Tougher is ABS (or PVC) banding, the furniture-industry standard: impact-resistant and colored through, so the color does not vanish when you sand the edge. One thing to know up front: thick ABS usually cannot be ironed on, more on that below. For a wood look that takes stain or oil, there is real wood veneer banding.
Which thickness to pick
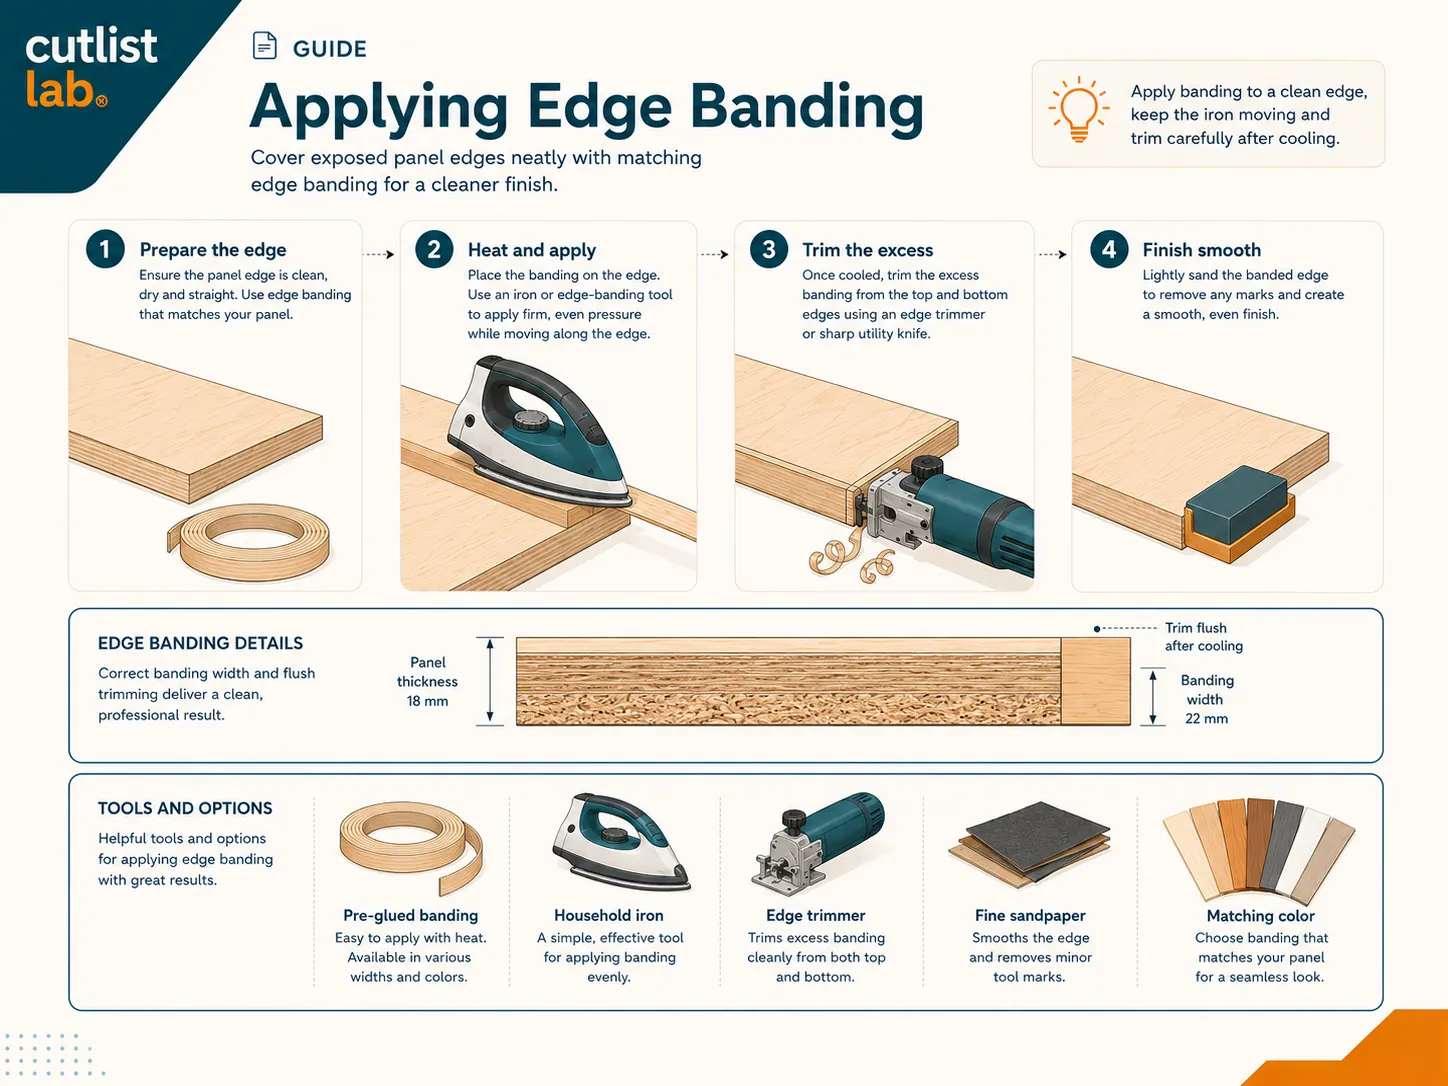
The industry rule of thumb: 0.4 mm (1/64″) for edges out of sight and tight, clean work, 1 mm for visible edges with a small radius, 2 mm (5/64″) for edges that take knocks, like desktops and door fronts. Thick banding also hides a dark particleboard core better under a light decor. Always pick banding a little wider than your sheet is thick: on 3/4″ (18 mm) board use 7/8″ (22–23 mm) banding and trim the overhang afterwards.
Get the conditions right first
The banding manufacturers (EGGER, Rehau, Ostermann) all set the same conditions, and they explain most cold-garage failures: work at 65 °F (18 °C) or warmer, avoid drafts (hot-melt glue cools too fast to bond), and let cold-delivered banding and boards acclimatize for 24 hours. The trade rule: if you need a coat in the workshop, it is too cold for edge banding.
Iron-on banding, step by step
- Make the cut edge flat, square and dust-free; a light sanding is fine, then dust off.
- Cut the band with about 2″ (5 cm) of extra length.
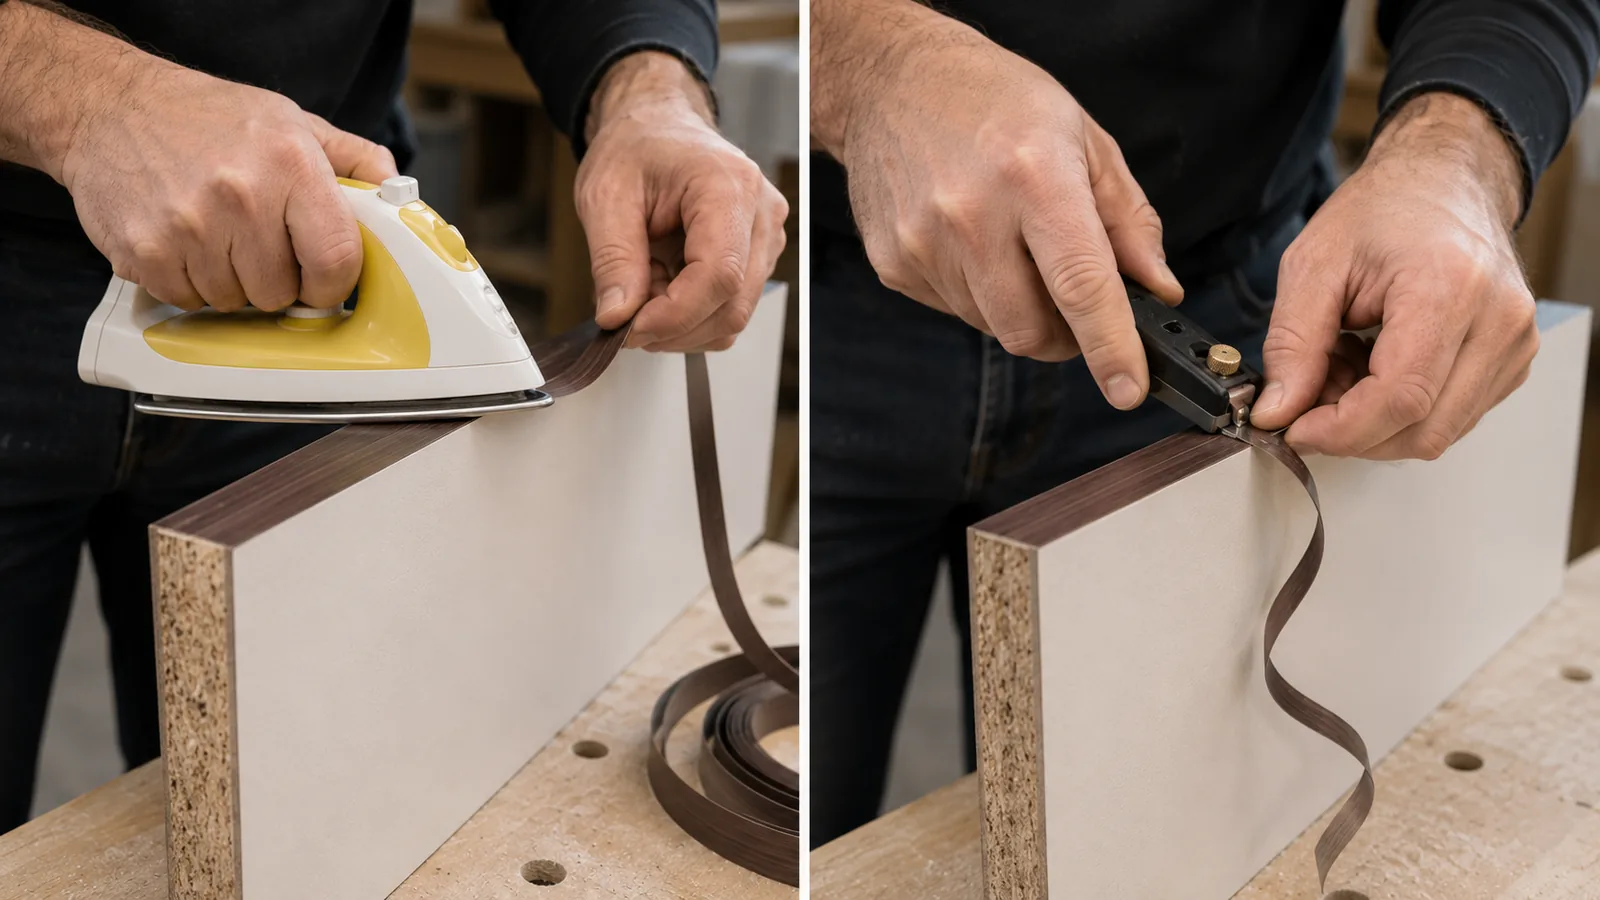
- Set the iron to medium: 300–350 °F (150–180 °C), the wool/cotton setting, steam off. On light colors, lay baking paper or a thin cotton cloth over the band against scorch and shine marks.
- Iron the first 4–6″ at one end and let it cool for a moment so the band is anchored and cannot shift. Then iron the rest slowly, with firm pressure.
- Rub down hard right behind the iron with a wood block or sanding cork while the glue is warm. This is the step that decides whether the band stays on; the soft roller from banding kits is too soft, and a cloth even more so.
- Check after cooling: a loose spot can simply be re-heated and pressed again. Hot-melt stays re-meltable, so the method is repairable.
- Trim the ends in two or three light passes (not one heavy one). Trim the long edges with an edge trimmer, a sharp chisel or a utility knife, always cutting toward the panel: that presses the band down instead of lifting it.
- Break the sharp corner with 120–180 grit on a block, at roughly 45 degrees.
Thicker banding? Use contact cement
This is where many projects go wrong: from about 1/32″ (0.8 mm) of ABS, the iron's heat no longer gets through the band and the glue never melts. The DIY route for thick banding is contact cement: coat both surfaces thinly (twice on thirsty edges like MDF end grain), let it flash off for 10 to 15 minutes until touch-dry, then press the band on in exactly the right place with a hard roller. Contact cement grabs instantly, no clamps needed, but there is no repositioning. Mask the panel face next to the edge with tape to keep glue lines clean. For big jobs or perfection, many lumber suppliers will apply banding by machine per foot or metre.
Kitchens and bathrooms: watch the glue
Standard hot-melt (EVA) stays re-meltable and lets go over time under heat and steam: think of the dishwasher, kettle or coffee machine under a wall cabinet. For kitchens and bathrooms the industry uses PUR glue, which cures chemically and is water- and heat-proof (EGGER specifies it for wet areas). PUR is hard to apply DIY; the sound route here is having ABS banding machine-applied with PUR. Melamine and veneer banding are poor choices in wet zones.
Allow for the band thickness
If a panel has to end up at its finished size including banding, you cut it smaller by the band thickness per banded edge. A worked example: a shelf with a finished length of 24″ (600 mm) and 2 mm ABS on the front gets cut at 598 mm; banding front and back makes it 596 mm. With 0.4 mm banding the correction often disappears in your saw tolerance, but 2 mm banding on two edges is 4 mm, enough to make a drawer or shelf genuinely bind. In cutlistlab you mark which edges get banding and how thick; the cut size is corrected automatically while the finished size stays right.
Which edges, and in which order?
Band only the visible edges: the front of a shelf, the visible sides of a carcass, the top of a door. Hidden edges stay bare, which saves work and material. Banding several edges of one panel? Work from least visible to most visible: the last band applied overlaps the end grain of the earlier ones, so the cleanest joint ends up on the show edge.
When it goes wrong
| Symptom | Likely cause | Fix |
|---|---|---|
| Band lets go, glue stays on the panel | worked too cold (room or material), drafts, too little pressure | 65 °F+, kill the draft, re-heat and press down hard |
| Band lets go, glue stays on the band | dust or moisture on the cut edge | sand the edge, dust off, redo |
| Blisters | ironed too fast, uneven pressure | cloth over it, re-heat and press; pop a stubborn blister with a pin |
| Shiny or deformed band | iron too hot or held in one spot | medium setting, baking paper in between, keep moving |
| Ends lifting | ends got too little heat and pressure | re-heat the ends and clamp until cold |
| White line when trimming (ABS) | too much material removed in one pass | thin passes; warm gently and buff to bring the color back |
What you need (iron-on method): pre-glued banding wider than your sheet thickness, a household iron, a hard press block or sanding cork, a sharp chisel or utility knife plus optionally a double-edge trimmer (e.g. Virutex AU93, trims both overhangs at once, up to 0.6 mm band), and a sanding block with 120–180 grit. For thick banding: contact cement and a hard roller. All of it available at any home center or lumber supplier.
Account for banding automatically. In cutlistlab you mark which edges get banding per part, and the cut size is adjusted so the finished panel comes out to size, free, no account.
Frequently asked questions
What setting should the iron be on for edge banding?
Medium, about 300 to 350 F (150 to 180 C), the wool/cotton setting, steam off. Too hot scorches or deforms the band, too cold never melts the glue. When in doubt, put baking paper or a thin cloth in between.
Can I iron on ABS edge banding?
Thin pre-glued ABS sometimes, but from about 0.8 mm the heat cannot get through the band. Use contact cement instead (coat both sides, flash off 10 to 15 minutes, press down hard) or have the panels banded by machine.
Which edge banding for a kitchen or bathroom?
Plastic banding (ABS or PP) glued with PUR: that is water- and heat-proof. Melamine and veneer banding let go over time in wet zones. For DIYers, machine-applied PUR banding is the solid route.
Does edge banding change my cut sizes?
Yes, by the band thickness per banded edge. With 0.4 mm banding it is often negligible; 2 mm banding on two edges is already 4 mm and a shelf or drawer will bind. cutlistlab corrects the cut size per edge automatically.
My edge banding is coming loose, now what?
Pre-glued banding can simply be re-heated with the iron and pressed down hard until cold; the hot-melt reactivates. If it keeps letting go, the edge was probably dusty or the room too cold when it went on.
How thick should edge banding be?
0.4 mm for edges out of sight and tight work, 1 mm for visible edges, 2 mm for edges that take knocks like desktops and fronts. Pick the band a little wider than the sheet is thick.