
How cutlistlab works
A short rundown of the icons and buttons in the tool, the terms you will come across, and how to cut your sheets yourself with a circular saw.
Looking for everything? The manual explains every screen, every button and every setting, with screenshots and a search box.
Prefer watching?
Short guides to the tool, on our channel on YouTube.
Quick start
Three ways to begin, all free and without an account.
Cut list
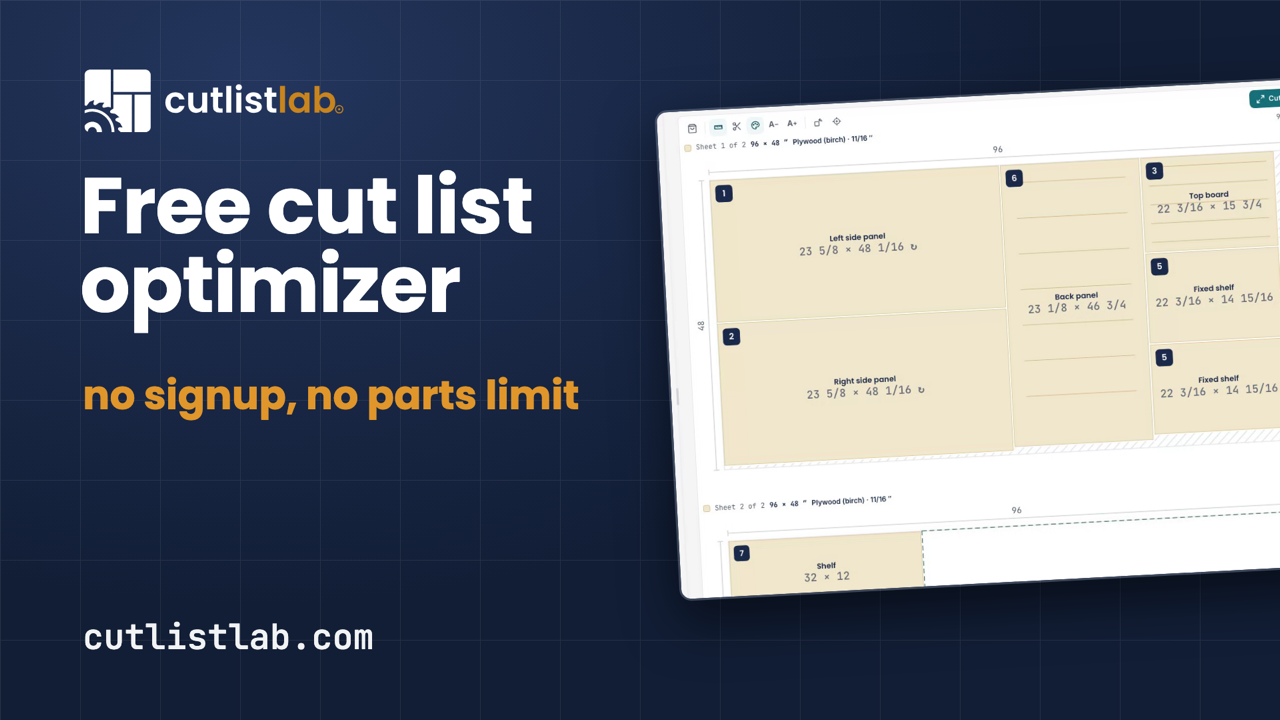
Enter your parts (name, length, width, quantity and material), choose your sheet material and cutlistlab works out the cutting plan with as little waste as possible.
Cabinet designer
Pick a cabinet type, adjust the outer dimensions and drag shelves, dividers, doors and drawers into place. The panel sizes and the cutting plan update right along with you.
Linear
For boards, battens and profiles (one dimension): enter your pieces and stock lengths, and the tool packs the pieces onto the bars as efficiently as possible, with the same tick-off cutting order.
Rather look around first?
Via the project menu (the ∨ arrow next to the project name), Example projects opens a complete example with one click. You can change anything; it only becomes your project on your first own edit.
Guides: how to make a cut list · how many sheets do I need · cutting straight with a circular saw.
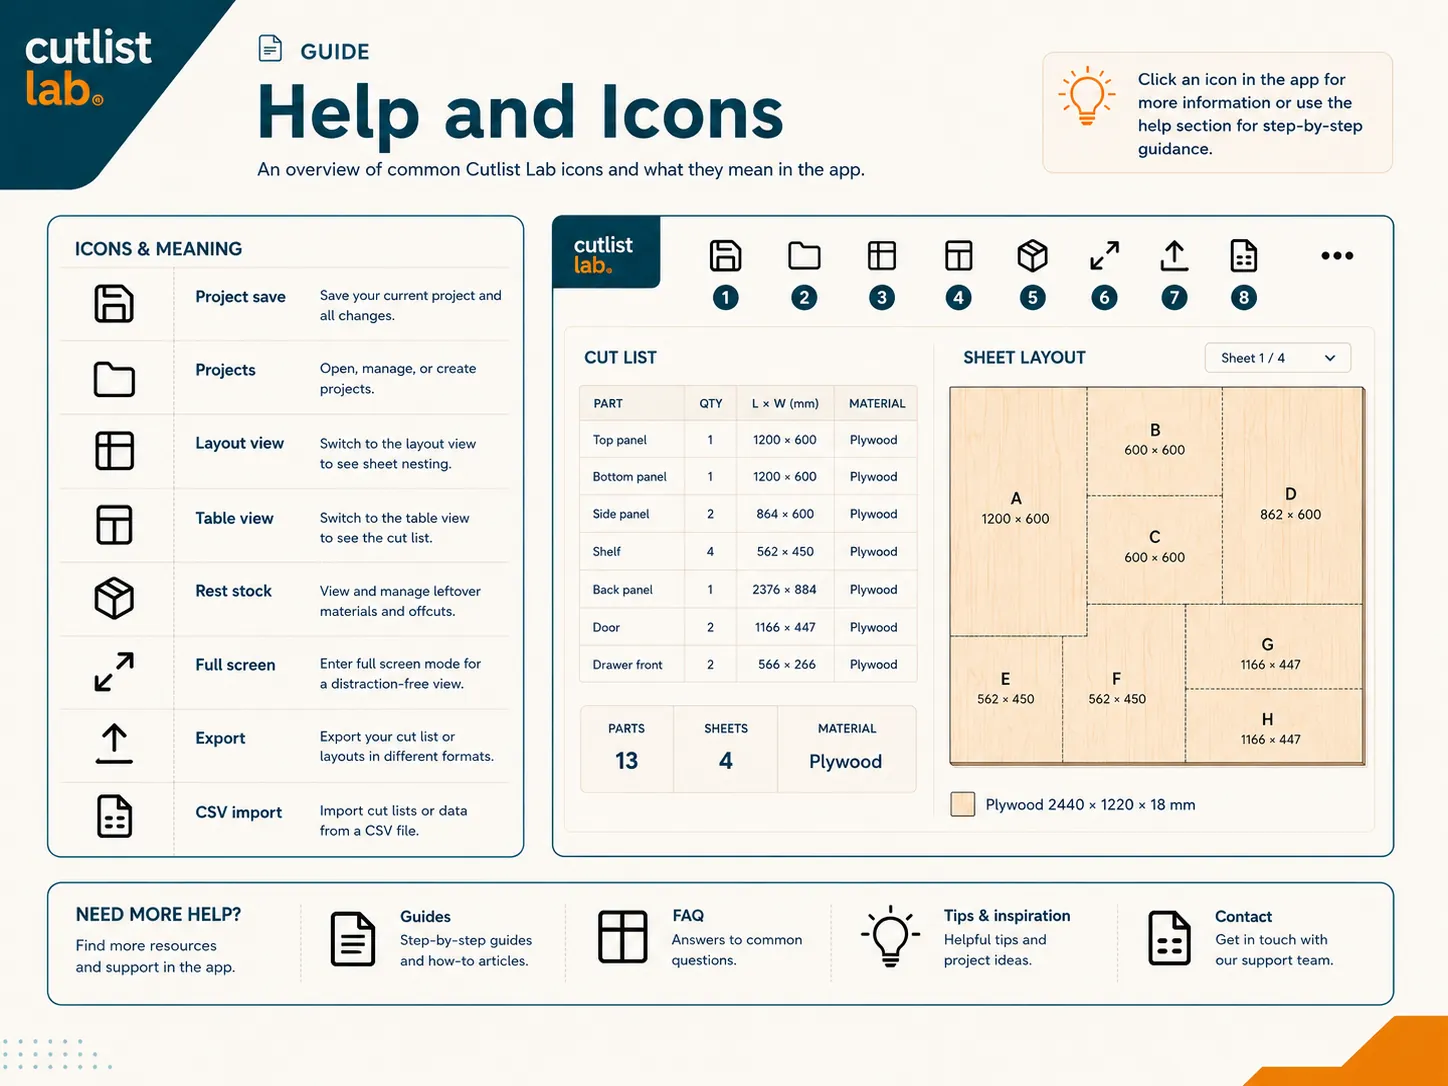
Icons & buttons
The main buttons you will run into in the tool.
Terms
The trade terms you will meet in the tool, briefly explained.
Unit (mm, cm, inch, ft + in)
In Settings you choose the measurement unit. Inch shows as a fraction (3/4″) and ft + in as feet and inches (8′ 0″). In inch or ft mode you can also type fractions and feet, for example 4′ 8″ or 12 1/2. Internally the tool always works in millimetres, so switching units only changes the display, not your project.
Cut size and finished size
The cut size is the size you actually cut to; the finished size is the size of the completed part. With edge banding you cut narrower (the banding brings it up to finished size), with a groove you cut larger.
Kerf (saw cut)
The width the blade removes per cut. Ten crosscuts at 1/8 in each remove 1 1/4 in in total. cutlistlab adds this up cumulatively; measure your actual blade width for the best result.
Trim (edging a sheet)
A narrow strip you cut off each side of a full sheet to remove the factory or rough, out-of-square edge, so you have a clean reference side (often about 3/16 to 3/8 in). You set the trim under Settings; it shrinks the usable size and counts as waste. Offcuts get no trim, since they are already cut. In the cutting plan you see a dashed line where the clean edge begins.
Grain
The direction of the wood structure. If a sheet has grain, parts that need it are rotated automatically so the grain runs the same way everywhere. Material without grain may rotate freely for a better layout.
Edge banding
The narrow finishing strip on a visible edge. You choose per side whether banding goes on; the cut size is reduced there by the banding thickness, so the panel with banding comes out exactly at finished size.
Waste and offcut
Waste is material too small to keep; an offcut is a usable leftover piece. You can save an offcut in your offcut stock and reuse it on a later project.
Offcut stock
Offcuts that carry over between projects. Set a project to Done and its usable leftover panels land in your offcut stock automatically (project menu → Offcuts); you can also add pieces yourself. In a next project, tick Use my offcuts and the tool uses matching offcuts before it cuts into a fresh sheet. A piece in use is reserved under that project's name, so you never use it twice.
Standard and Advanced
In the project menu you switch between two modes. Standard keeps the screen calm. Advanced shows the extras: the optimisation goal, the Grain and Banding columns in the parts list, prices, and manual adjusting (select and drag panels in the plan, after which the tool recalculates). On a wide screen (the desktop layout) this switch is replaced by individual toggles under Settings: turn on exactly the columns you need (Material, Thickness, Grain, Edge banding, Store, Price and Manual).
Optimisation goal
What the tool steers for, under "Optimize for" (on mobile in Advanced; on a wide screen the choice is right there): Least waste wastes as little material as possible, Fewest cuts means the least sawing work, and Lowest cost finds the cheapest combination of sheets (fill in prices on your sheets, or use the library). Switch and recalculate as often as you like.
Does not fit (message)
If a part fits on no sheet at all, it gets a badge and a message explains why: wrong material, different thickness, too big, fixed grain, or the sheets are full. The message comes with one-click fixes, such as adding a sheet or thickness, using a near-identical material, allowing rotation, swapping length and width, adjusting the size or splitting the part.
CNC mode
A switch under Settings for CNC router users: parts are packed as tightly as possible, including internal cut-outs. Note: that layout can NOT be cut with a circular saw or track saw. Export via Export → CNC export (DXF).
Share this project
Under Export you find Share this project: you get a link (or your phone's share sheet) that opens your project for someone else. The whole project travels inside the link itself, nothing is stored on a server; the recipient gets their own copy to edit freely.
On your home screen
cutlistlab works as an app on your phone: after your first calculation the tool offers to add itself to your home screen. On Android the button opens your browser's install prompt; on iPhone and iPad it goes through Safari: share icon → Add to Home Screen. After that it opens full-screen, with your projects right there for the next build.
Sheet material library
Under Sheet material, click Library to pick from your own saved sheet sizes, the boards you have used before, so you do not have to retype them. With Add you drop a sheet into your project; the sizes carry over and you can still adjust them. No store data, just your own list.
Efficiency per material
If you use more than one material, you see a breakdown per material under the figures: for each material the number of sheets and a bar showing how much is used, offcut and waste. This matters because the tool does not move parts across materials: each material fills its own sheets. Half-filling one sheet of MDF leaves a lot of offcut, even if your overall plan is efficient. So you can see per material where there is still room (for example choosing a smaller sheet size or using an offcut).
Playing the cutting order
Above the sheets there is a playback bar. Step through the plan cut by cut with previous and next, or click Play to run it automatically. The active cut lights up in the drawing (dark, solid) and the cuts still to come fade out, so you see exactly which cut is up next. The checkboxes for ticking off cuts keep working as usual.
With Cut-along mode you open a full-screen focus view: at each cut the drawing zooms automatically to the right sheet and centers the active cut, with the controls fixed along the bottom. That way you never have to scroll at the saw to find the next cut.
Printing labels
Under Export, choose Print labels: one label per cut piece, grouped by sheet. Each label shows the number (as in the cutting plan), the name, the cut size, the finished size, the material, and a small drawing with the banded sides and the grain direction. Stick them on your panels so pieces do not get mixed up. Choose Full (with drawing) or Compact (more per sheet). Print on plain paper and cut them out, or on a Letter label sheet.
Saving and loading a project
Under Export → Export project file you store your whole project as a file on your device: both the design and the cut list. Via the project menu (∨ next to the project name) → Load project you reopen such a file later, even on another device. Handy as a backup or to share with someone. (Your projects are kept locally anyway; this is a separate file you manage yourself.)
Cut list or cabinet design
In the Projects overview (project menu → Projects), each project carries a label showing what it is: Cabinet design if you set it up through the cabinet designer (a cabinet with a layout, plus the matching cut list), or Cut list if it is just a standalone parts list. So you can see at a glance which project contains a real cabinet design.
CSV: exporting and importing a cut list
Under Export → Cut list as CSV you save your parts as a table (opens in Excel or Numbers; handy to share with a lumber yard or to do your own math). Via the project menu → Parts from CSV you read a list in: paste a table from Excel or pick a CSV file. We recognize the columns name, length, width, quantity and material, and optionally thickness, grain and banding per side; a header row may be in English or Dutch. You choose whether the parts are added or whether they replace the existing list.
Overlay and inset
An overlay door or front sits on top of the opening; an inset one falls inside the opening with a small gap (the reveal) all around. A drawer behind a door is always inset.
Drawer slide clearance
The space the drawer slides need on each side. It sets the drawer box width: box width = opening width − 2 × clearance. Bottom-mount slides need little clearance, side-mount slides about 1/2 in per side.
Plinth
The recessed base under a cabinet. You choose whether the side panels run down to the floor (with the plinth between them) or whether the bottom panel runs through with the sides on top.
Attic cabinet (sloped side)
A cabinet with one side at full height and the other lower, with a sloped top between them. Under Construction, pick which side is high (left or right) and the low height. The shelves stay level and get shorter in the sloped part. In the cutting plan you see the sloped parts as a bounding rectangle with the sloped cut line on it, so you can bevel them at home.
Shelf on pins or fixed
Per shelf you choose how it sits. On pins (adjustable) is a loose shelf on shelf supports that you can reposition in height; it is a little narrower per side (the clearance to slide it in, about 1/16 in by default). Fixed butts against the side panels, at the full width of the opening, and cannot be moved. The choice sets the shelf width in the cutting plan; you set the clearance under "Fine-tune shelves".
Cutting it yourself
Cutting sheets at home with a circular saw and a track or guide rail.
Follow the numbered cutting order
Make your cutting plan in cutlistlab and look at the numbered cutting order. It gives the cuts per sheet in a logical sequence, so you break the sheet down a few clean cuts at a time instead of guessing where to start.
What do I need (shopping list)
Under Export you find What do I need: a shopping list with your sheets, the length of edge banding and the hardware (hinges, drawer slides, shelf pins, handles), with indicative prices from the sheet library. Copy it as text or print it; if you use your offcut stock, it has already been subtracted.
Use a track or guide rail
A circular saw with a track (or a clamped straightedge) gives you straight, square cuts you can trust as a reference edge. Work to the cut sizes from the plan and check each one before you cut.
Never lose your place with Cut-along mode
Open Cut-along mode on your phone at the bench: it zooms to the right sheet and centers the active cut for you, so you always know which cut is next without scrolling.
Read the full guide: cutting straight with a circular saw → · how to make a cut list →