
cutlistlab › Manual › The cabinet designer
Chapter 12
The cabinet designer
From cabinet size to parts list: pick a type, fill in sizes, divide the compartments, and set the construction.
Why you want to use it
You can type every part by hand. But with a cabinet that means: every time you change one dimension, you recalculate all the others. Two sides get shorter, the shelves get narrower, the back panel no longer fits.
In the cabinet designer you give the outside dimensions and draw the layout. The parts list follows from that, and stays correct when you change something. You see the cabinet in elevation while you work.
You open it with the Cabinet designer tab at the top.
Choosing a cabinet type
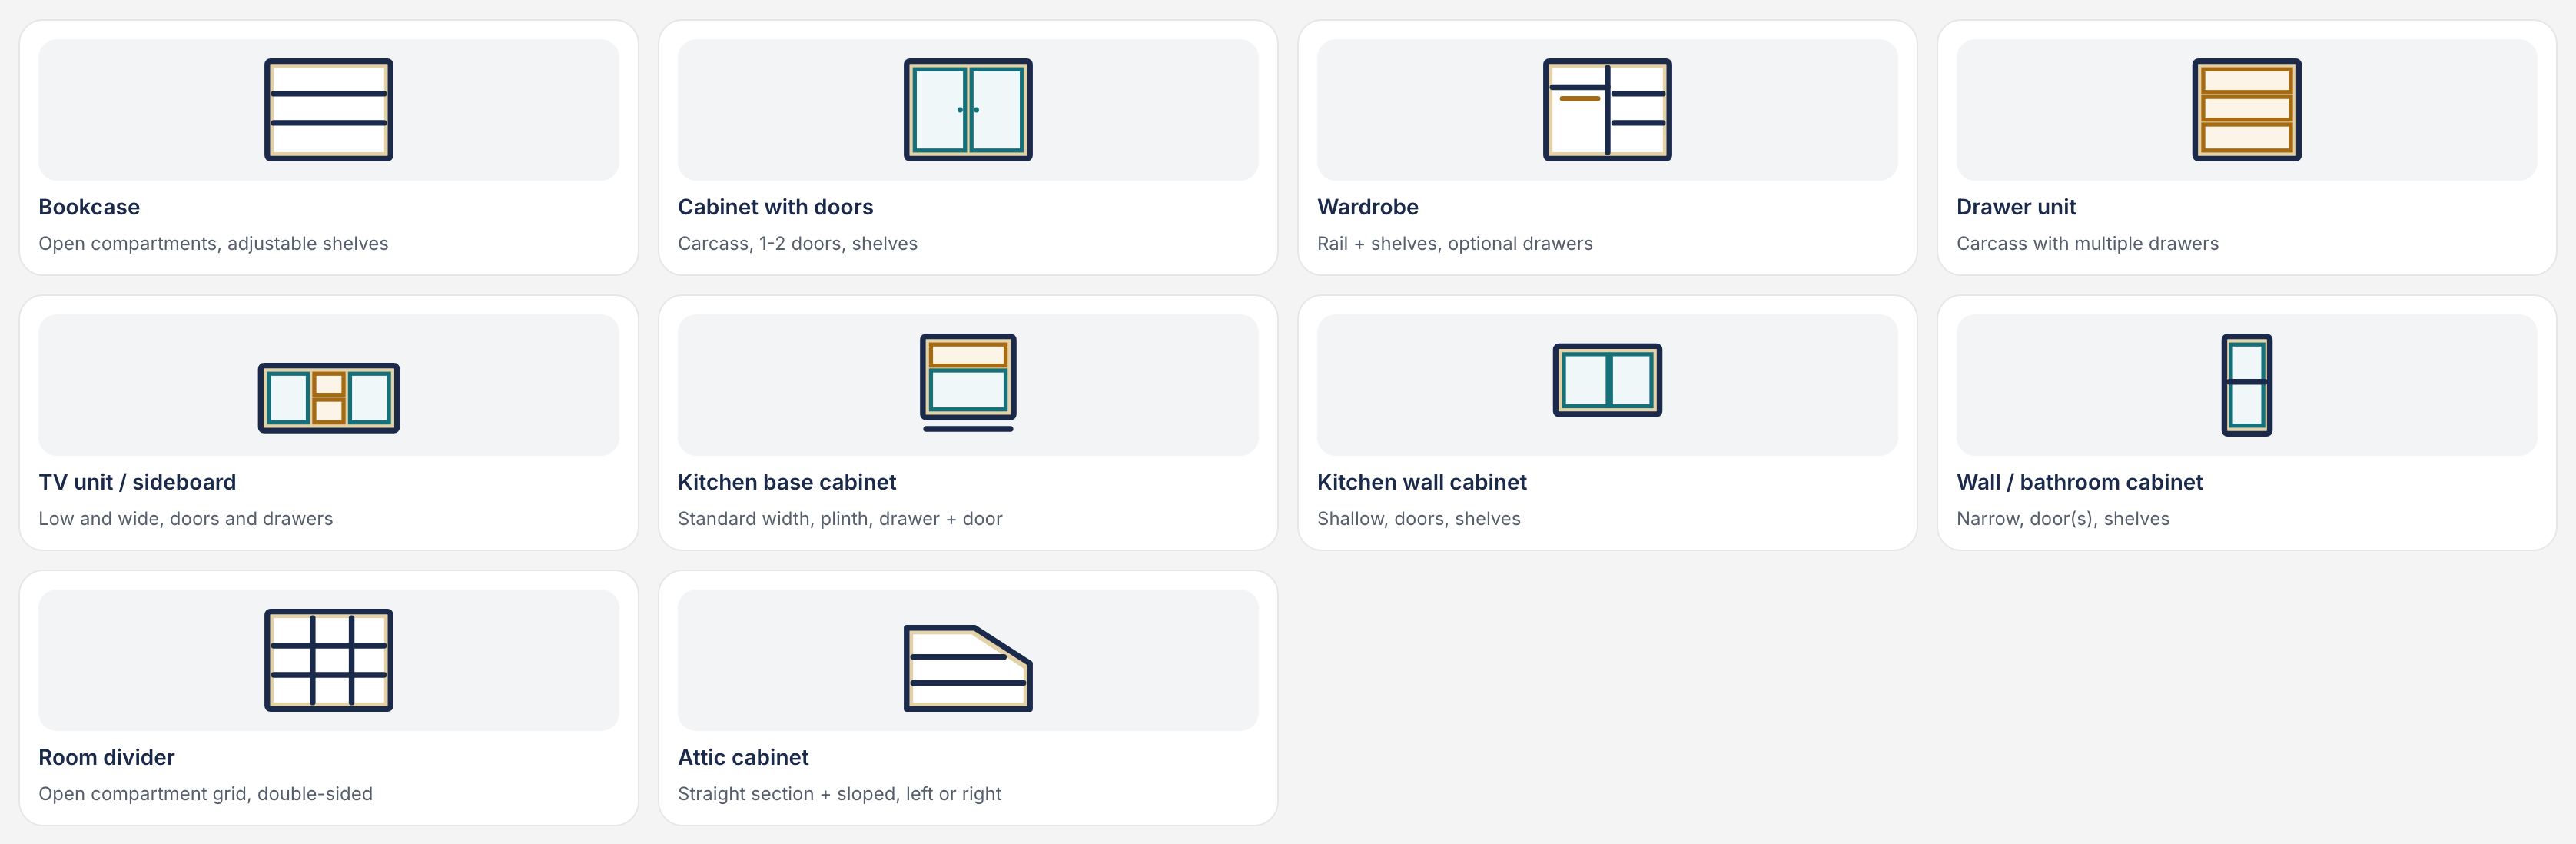
You start with a type. That is not a straitjacket: it only decides where you begin, and after that you change whatever you like.
- Bookcase
- Open compartments, adjustable shelves
- Cabinet with doors
- Carcass, 1-2 doors, shelves
- Wardrobe
- Rail + shelves, optional drawers
- Drawer unit
- Carcass with multiple drawers
- TV unit / sideboard
- Low and wide, doors and drawers
- Kitchen base cabinet
- Standard width, plinth, drawer + door
- Kitchen wall cabinet
- Shallow, doors, shelves
- Wall / bathroom cabinet
- Narrow, door(s), shelves
- Room divider
- Open compartment grid, double-sided
- Attic cabinet
- Straight section + sloped, left or right
The cabinet dimensions

- Height
- The outside dimension from top to bottom, including the plinth.
- Width
- The outside dimension from left to right, so including the thickness of both side panels.
- Depth
- From front to back. Doors usually sit in front of that; so the cabinet ends up slightly deeper than this number.
- Thickness
- The sheet thickness of the carcass. 18 mm is common for a cabinet that has to carry something.
- Material
- The sheet material. If you want fronts from something else you can set that per part; Mixed then appears.
Dividing the compartments
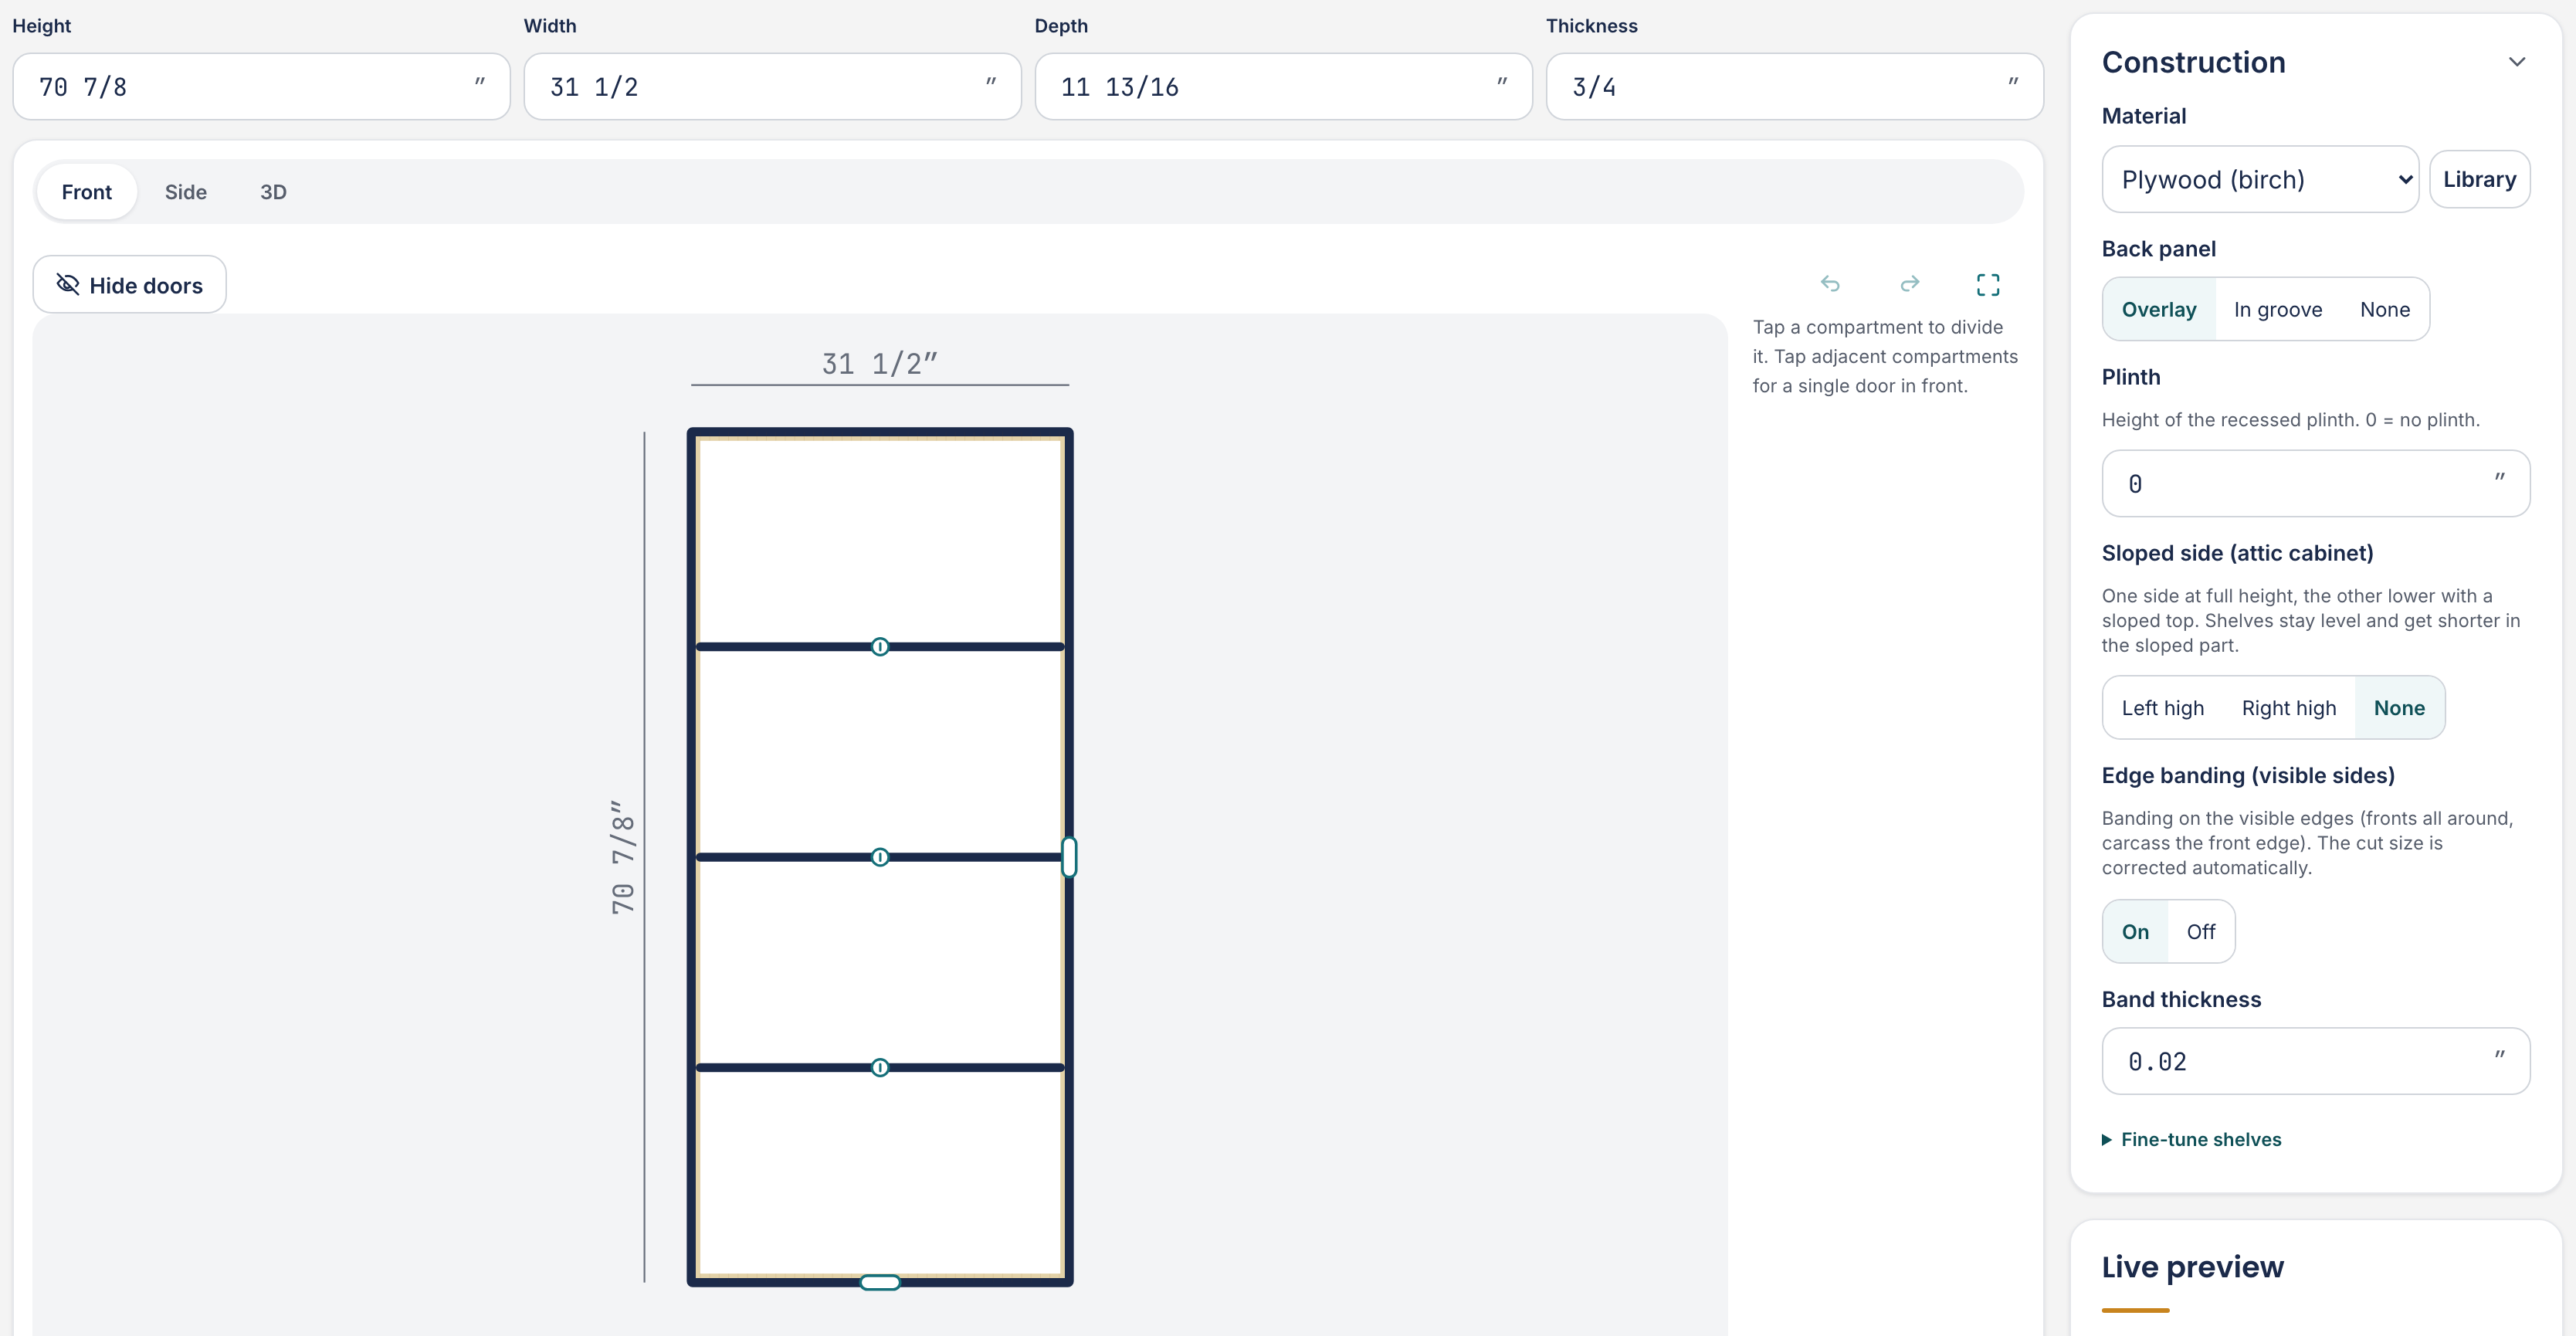
Tap a compartment in the drawing. On the right appears what you can add to it: Add to this compartment:
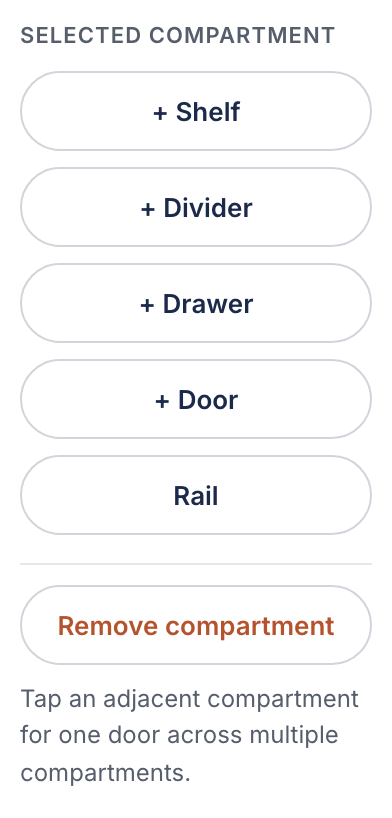
- + Shelf
- A horizontal shelf; the compartment is split in two.
- + Divider
- A vertical divider; the compartment is split side by side.
- + Drawer
- A drawer in this compartment. See Drawers, doors and hardware.
- + Door
- A door in front of this compartment. Tap an adjacent compartment for one door across multiple compartments.
- Rail
- A clothes rail in this compartment, with the brackets added to the shopping list.
- Empty
- Empty this compartment, but keep the compartment itself.
- Remove compartment
- Remove the compartment itself; the neighbouring one grows.
How the shelves are spread over the height is set with Distribution: Equal makes all compartments equally tall, Increasing makes them taller towards the bottom (handy for books), and Manual lets you set each compartment yourself under Fine-tune shelves.
Per shelf you choose in the bar: on pins (adjustable) or fixed (against the sides). Fixed is exactly the compartment opening; on pins it is this clearance narrower per side.
The construction
Below the dimensions sit the choices that decide how the cabinet goes together. They really change the parts list, not just the drawing.
- Back panel
- Overlay lays a panel against the back, In groove runs it in a groove (neater and stiffer), and None leaves it out. A cabinet without a back can rack out of square.
- Plinth
- Height of the recessed plinth. 0 = no plinth. Sides running to the floor, or the base panel continuous with the sides on top.
- Back rails
- Narrow cross rails at the back, in the same sheet material. They keep the sides apart and give you something to screw to the wall. They do not stop the cabinet racking; for that you need a back panel in a groove or fixing it to the wall. Inset: between the sides. With dividers you get one piece per bay, because the rail cannot pass through them. Surface: against the back across everything, one piece as long as the outside width.
- Grain direction
- Keep grain follows the wood grain per panel; least waste lets panels rotate freely (on grain-free boards like melamine that already happens).
For an attic cabinet two extra fields appear: One side at full height, the other lower with a sloped top. Shelves stay level and get shorter in the sloped part. The height on the low side (the full height is set under Height). And Width of the full-height section on the high side; that is where the slope begins. 0 = fully sloped.
The stability check
Under Stability the tool checks whether your design holds up. You state how heavily the shelves are loaded: Light, Mixed or Books.
If nothing is wrong, it says Sturdy design. Otherwise you get a concrete warning, such as a shelf that may sag, a cabinet that may rack without a back, or a tall cabinet that must be anchored to the wall.
On to the cutting plan
Done designing? Go to the Cutting plan tab. Your parts are already there, with the names the cabinet gave them. The sheet list is filled in too; those rows carry the badge suggested.
Parts that come from the cabinet cannot be renamed individually: they belong to a compartment in the design. Change something in the cabinet and they follow.