
cutlistlab › Manual › Offcut stock
Chapter 15
Offcut stock
Keeping offcuts across projects, letting them join the calculation automatically, and tracking what is still in your shed.
The idea
Almost every project leaves usable material. You do not throw it away, but next time you no longer know exactly what is there. The offcut stock is the list that tracks it, and that the tool consults itself before cutting into a new sheet.
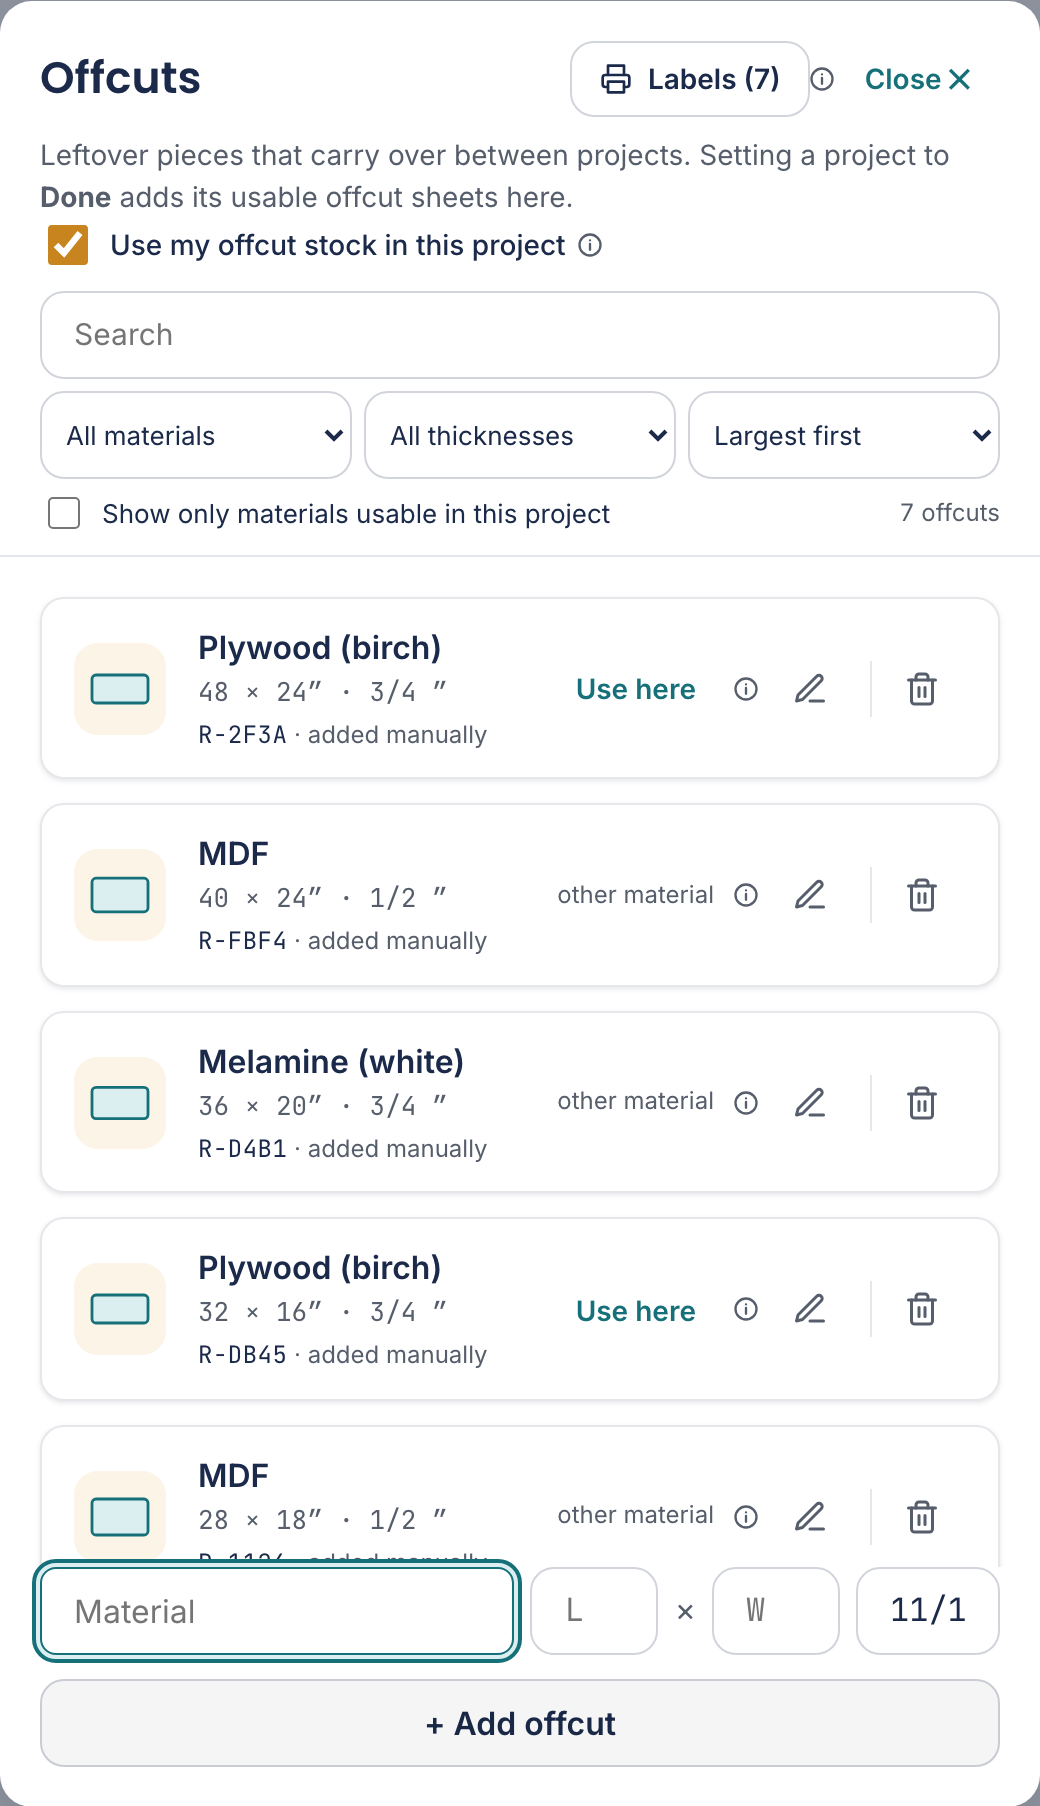
You open it through Offcuts in the menu behind the project name. Leftover pieces that carry over between projects. Setting a project to Done adds its usable offcut sheets here.
How pieces get in
There are two ways.
- From a project. Mark a project Done in Projects. The usable offcuts from that plan then enter your stock, noting which project they came from. Reopen the project and they disappear again.
- By hand. If wood is already in your shed, add it yourself at the bottom: material, length, width and thickness, then + Add offcut. Add a piece you already have at home Such pieces get the badge added manually.
You decide yourself which pieces are big enough to keep, with Minimum offcut. See Settings.
Expected: the piece does not exist yet
Marking a project Done means "design finished" to the tool, but usually "not cut yet" to you. That is why a freshly harvested offcut first gets the badge expected.
This piece comes from a project you marked Done but have not cut yet. That is why it is not used automatically in another project.
At the top a bar appears per project: One offcut from Side is waiting: marked Done, but not cut yet. The button I have cut this makes all pieces of that project real in one click. From then on they simply count.
Using offcuts
With Use my offcut stock in this project on it happens by itself: Offcuts in a material this project uses join the calculation automatically, before a new sheet. They are only claimed for this project once the cutting plan actually uses them. Manage them with the Offcuts button. You see it in the plan by the orange dashed line around the sheet and the label from offcut stock above it.
To steer it, you can do so per piece.
- Use here
- Set this piece aside for this project and use it right away. Use this when you want to use up a particular piece, even if the tool did not pick it by itself.
- Release
- Back to the stock, other projects can use it again. The piece is no longer used in this project.
- Remove from your offcut stock, this piece no longer exists
- The bin. Only use it when the piece really is gone; releasing is almost always what you mean.
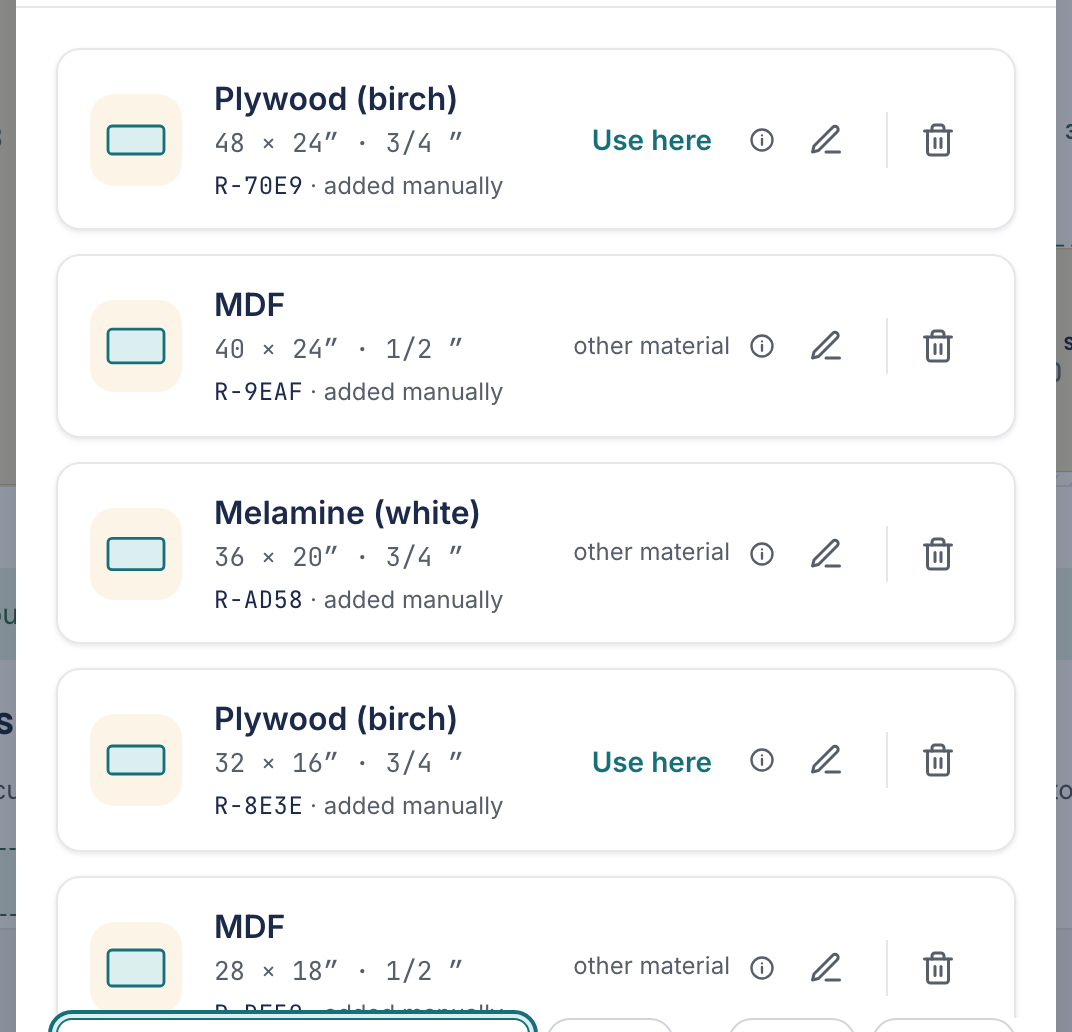
Each piece shows its status: In use (this project), In use by Side, or nothing when it is free. If the material does not match this project it says other material and the button is disabled: This material is not used in this project.
Searching, filtering and sorting
With a stock of dozens of pieces you do not want to scroll. At the top sit a search field and a filter bar.
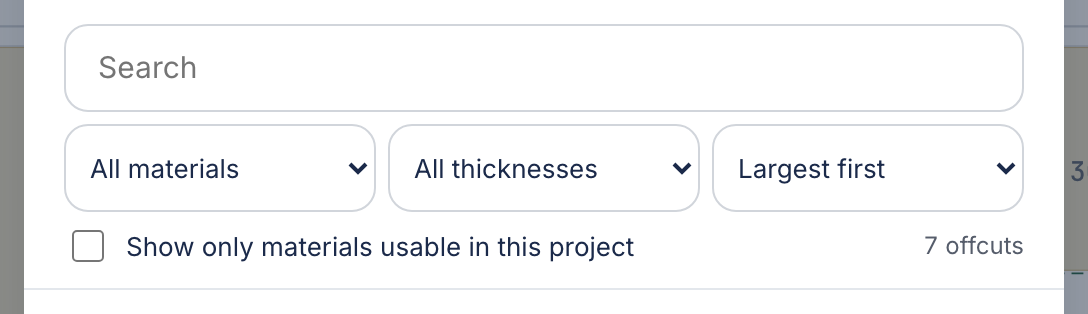
- All materials
- Show only pieces of one material.
- All thicknesses
- Show only one thickness.
- All projects
- Only pieces from one project, plus a choice for what you added yourself. Handy when you want to release per project once that project is cut.
- Show only materials usable in this project
- Hides everything you cannot use in this project anyway. Off by default; the counter 2 of 12 shows that filtering is active.
- Sort
- Largest first, Smallest first or Newest first.
If the filter yields nothing, it says No offcuts found. Adjust your search or filters.
Labels for your offcuts
A stock list only helps if you can find the boards in your shed. With Labels (2) you print a label per piece. Print labels for the pieces you see now
One label per offcut, with the same code as in your stock list. Stick them on the boards so you can find them on the rack. That code also appears above the sheet in the cutting plan, so you always know which piece to grab. See Labels.