cutlistlab › Manual › Reading the cutting plan
Chapter 8
Reading the cutting plan
What every area, line and number in the drawing means, and how to read the figures below it.
The drawing
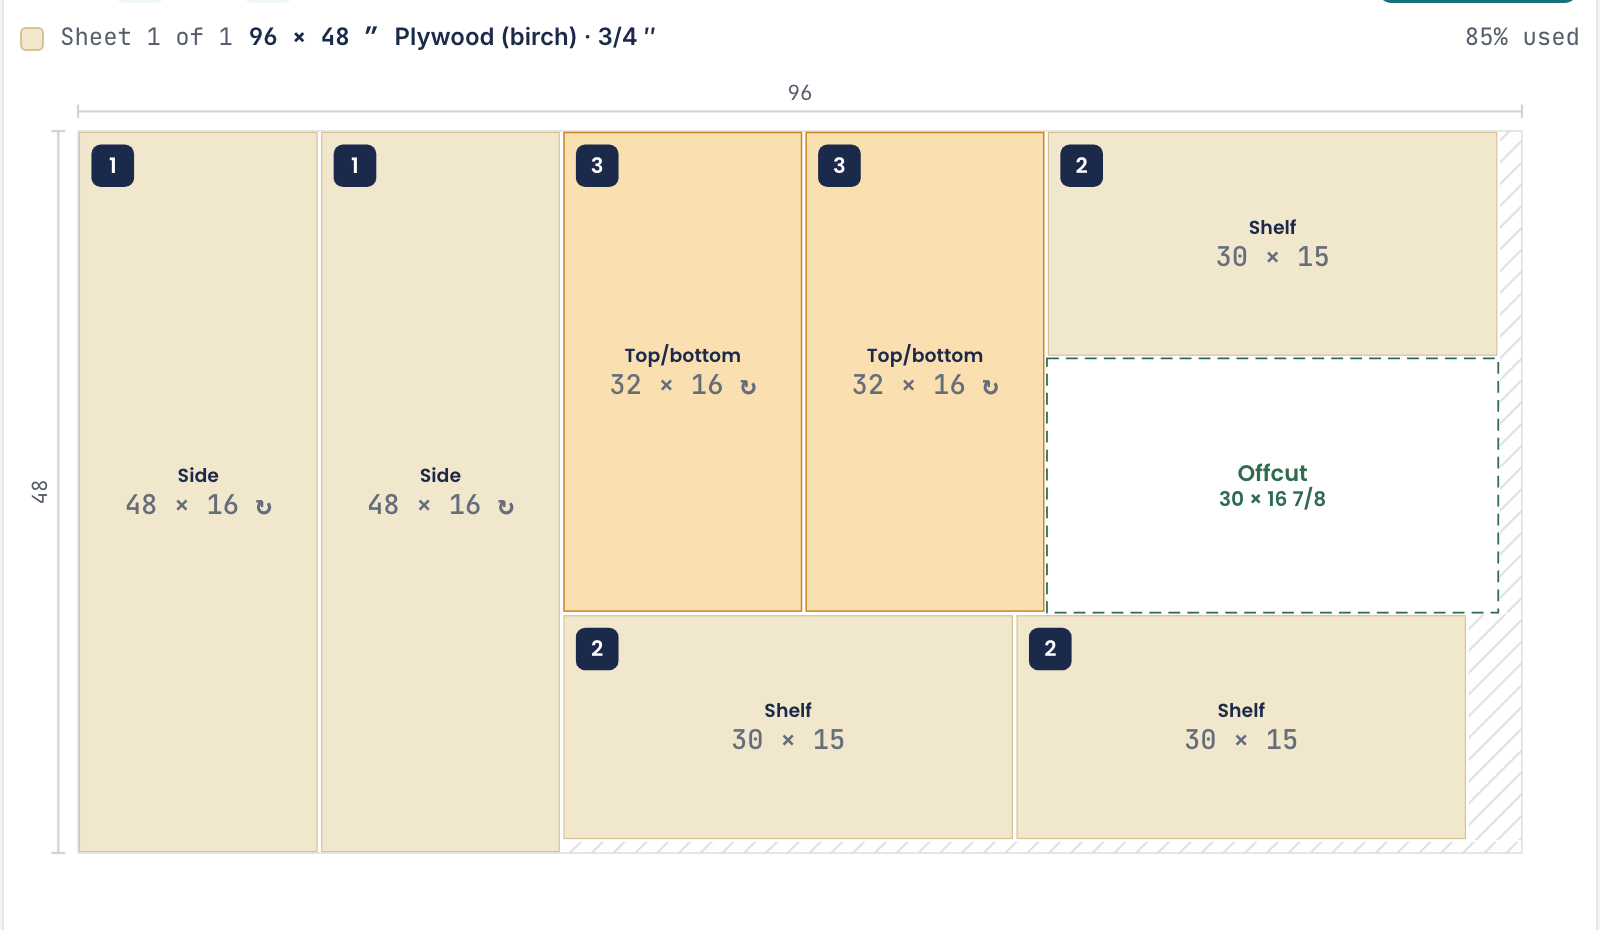
Each block is one sheet, seen from above. Above the block it says which sheet it is and how much of it is filled.
- Coloured areas
- Your parts. Each area shows the name and the size, and in the top-left the number that also appears in the parts list.
- [[schema.rest]]
- A piece that is left over and big enough to keep. You set the threshold yourself with Minimum offcut. These pieces go to your offcut stock as soon as you mark the project Done.
- Hatched strips
- Waste: too small to keep. The saw kerf itself is in here too, plus the trim edge if you set one.
- Dashed line around a sheet
- This sheet is not a new sheet but a piece from your offcut stock. Above the sheet it says from offcut stock.
- The rotation arrow
- Appears on a piece that lies a quarter turn from how you typed it. That is only allowed when the grain direction is free.
The line above each sheet

It shows in sequence: which block this is (Sheet 1 of 2), the size of the sheet, the material and thickness, and on the right how many percent of it is used. If it is an offcut, the code of that piece is there too, the same code as on your label.
The figures on the right
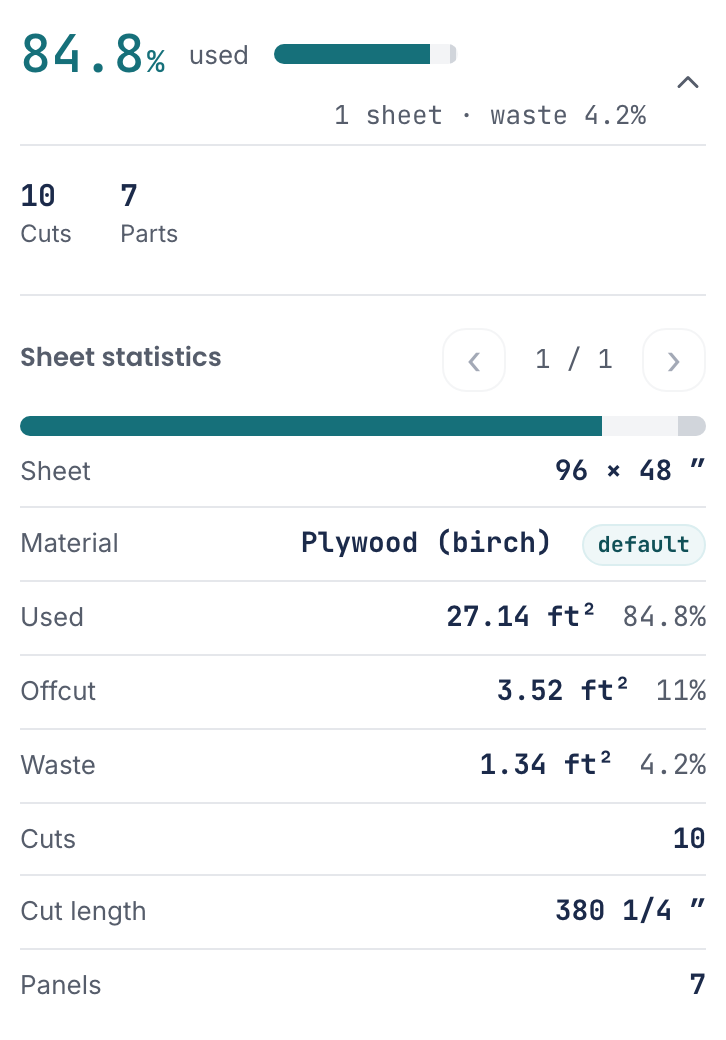
Collapsed it shows one line: how many percent used, how many sheets and how much waste. Expand it and you see the split in three parts.
- Used
- Share of the sheet filled by your parts.
- Offcut
- Usable offcuts you can keep for a next project.
- Waste
- Unusable waste: too small to keep.

Those three add up to one hundred percent. So watch the difference between offcut and waste: an offcut is a gain you use next time, waste is what you throw away. A plan with lots of offcut and little waste is fine, even when "used" looks low.
If you use more than one material, there is also a breakdown per material, and per sheet the details: Cuts, Cut length, Panels and Edge banding.
The coloured tips below a sheet
Sometimes an orange line sits below a sheet. That is not an error, but an observation you can act on.
- This sheet is only partly filled. A smaller size or a different material may be more economical. Often that is the last sheet of a project, and then there is little to do about it. If it appears on the first, check whether another size works out better.
- A line saying that a single piece opens a whole extra sheet. Then you know exactly which part to shave a few millimetres off to save a sheet.
What you see in the drawing
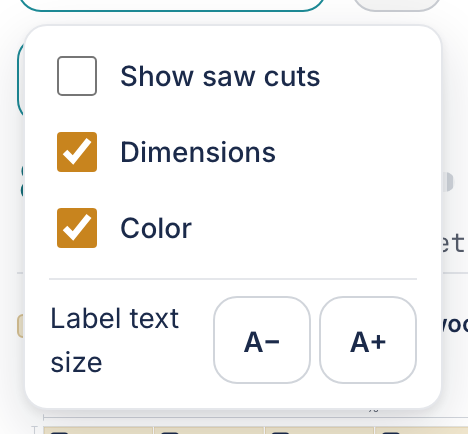
In the wide layout a row of icon buttons sits above the plan. There you switch on and off what gets drawn.

- What do I need
- The shopping list. See What do I need.
- Dimensions
- Show or hide the size in every area. Off gives a calmer picture to print.
- Show saw cuts
- Draw the saw lines separately. Handy to see in which order to cut.
- Color
- Give identical parts the same colour. Off puts everything in one tint, which helps on a black-and-white printer.
- Label text size
- A− and A+ make the text in the areas smaller or larger. With many small pieces, smaller is more readable, contradictory as that sounds.
- Rotate sheets 90°
- Rotate the whole drawing a quarter turn. Changes nothing in the calculation, only how it fits your screen or paper.
- ⌖ Search thoroughly
- Search longer for a better layout. See What the tool optimises for.
- Cut along
- Follow the cutting sequence fullscreen, cut by cut. See Cut list and cutting order.
In the narrow layout the same switches sit in a menu behind the sliders button.